
Before I go on, I must warn you... this is indeed a very geeky and unnecessary thing to do. No matter how much you may try, a tablet will never be such a good companion or a good device as a computer will ever be.
But be that as it may, it can still be extremely useful if you value mobility above anything else and you need to make or develop something quick and fast. Make some changes to some branch in your code or simply try for fun.
My Hardware Setup
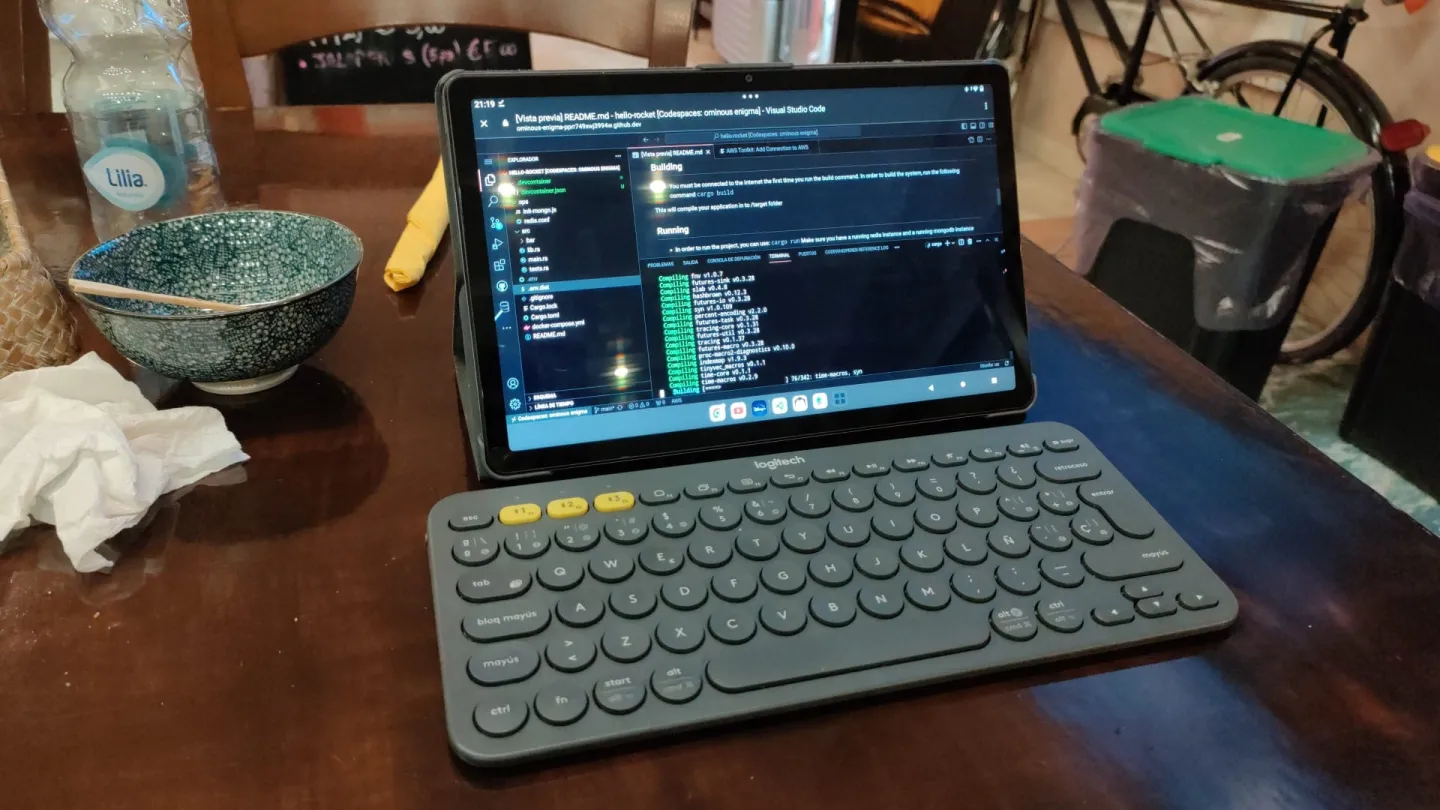
I own a Lenovo Tab M10 Plus Gen 3 10.6 device, with 128 GB of storage memory, and 8 GB ram. Not the best, not the worst. My Keyboard is a Logitech K380 Bluetooth keyboard. Do not attempt to do this without a keyboard. (it is too much).
Trying to code or use the tablet ina developer way without a keyboard is simply a no-go. Just. dont. If you want to test this for some fun, or you want to obtain something relatively viable, then you NEED a keyboard.
Step 1 - Install Termux
Termux is no longer available in the Play Store, so in order to obtain Termux, you must download it from their official site. Termux is an Android terminal emulator and Linux environment app that works directly, without the need to root or any sort of setup required.
You will need to download the correct version for your tablet. (Normally for modern tablets at the time of writing you should be using arm 64.

Step 2 - install proot-distro
Go inside of termux and, in case it is not, install PRoot (it should be installed though). PRoot is a user-space implementation of chroot, mount --bind, and binfmt_misc. This means that users don't need any privileges or setup to do things like using an arbitrary directory as the new root filesystem, making files accessible somewhere else in the filesystem hierarchy, or executing programs built for another CPU architecture transparently through QEMU user-mode. You can check the list of commands in their website.
pkg install proot //Termux should come with it's own version of proot
Then, install proot- distro, that takes care of management of the linux distributions inside Termux
pkg update
pkg install proot-distro
For now it supports these distributions:
- Alpine Linux (edge)
- Arch Linux / Arch Linux 32 / Arch Linux ARM
- Debian (stable)
- Fedora 35
- Manjaro AArch64
- OpenSUSE (Tumbleweed)
- Ubuntu (22.04)
- Void Linux
To install distribution, just run this command (assuming proot-distro is installed):
proot-distro install <alias>
(In my case I went for Debian). After installation, you can start a shell session by executing the following command
proot-distro login <alias>
Here is a basic overview of the available proot-distro functionality:
-
proot-distro list - show the supported distributions and their status.
-
proot-distro install - install a distribution.
-
proot-distro login - start a root shell for the distribution.
-
proot-distro remove - uninstall the distribution.
proot-distro reset - reinstall the distribution.
Example of installing Debian and launching shell:
proot-distro install debian
proot-distro login debian
This will allow you to launch a shell into a debian linux environment.
Step 3 - Install whatever you need to code.
You now have a functional linux distro running inside your tablet. It may not be the most powerful, but it works properly.
Install whatever you need to install inside your linux distro so that you can toy around and code. npm? rust? The choice is yours. just remember anything you install you need to download and use arm distros (or compile them in your tablet using cmake and so on)... In my case, I installed Rust.
Step 4 - Install VS-Code Server
Install vs code server. Follow the instructions in their Github website.
Depending on the version you have used, the instructions may vary, but basically you just need to download and run the install script
curl -fsSL https://code-server.dev/install.sh | sh
(if you don't have curl installed in your distro, then install it). You may find multiple guides as to how to install it using the different options listed here. However, you may find it more usefull if you check directly how to install it using Termux in this link.
Now make sure that the code-server is running. Since VS Code is simply html/css placed inside an electron- app, you can simply access localhost:8080 in your browser to access VS Code. From there , you can add it to your apps as a shortcut and Code Server will always run (as long as the code-server is running in your termux).